Recently, I purchased a new laptop. I was really focused on spending the least amount of money and had not noticed that the laptop I chose was missing an essential feature : it did not have Display Port over USB C. Not being able to use my second external monitor on this new laptop felt like a huge downgrade from my previous one (which was able to output to both its HDMI and VGA ports simultaneously).
This is the story of how I managed to overcome this limitation by rolling my own virtual screen streaming solution using a Raspberry Pi. I tried to write it in a way you can follow along if you want to reproduce it. If you are just looking to get it up and running as quick as possible, you can check out the GitHub repository containing configuration files and installation scripts (Work In Progress)
You will find a short video showcasing the result at the end of this article.
Existing solutions and limitations of old Raspberry Pi models
I quickly hooked a Raspberry Pi to the external monitor and tried to find a turnkey solution that would allow me to stream a virtual screen to the Pi via an Ethernet cable. I looked into using VNC, Steam Remote Play, and some dedicated VNC wrappers I found on GitHub.
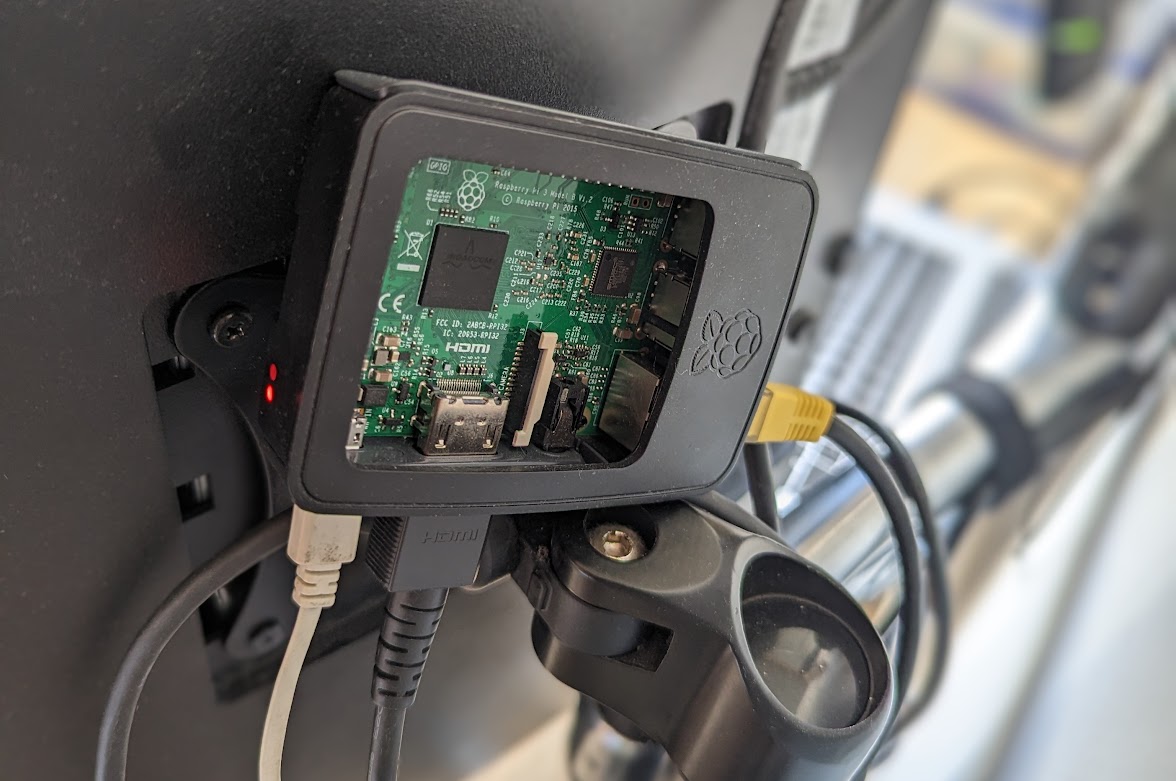
Since I was not willing to spend more money on my setup, I used a Raspberry Pi 3 which was sitting unused in one of my drawers. This little beasts support hardware-accelerated video decoding, including h264. However, as we’ll see later, my specific requirements made it harder to work with GPU video decoders. I had to compromise between picture quality, latency and framerate, and could never reach a balance I felt satisfied with : the slow LAN port and CPU could not handle my requirements.
I also did not like the fact that most of these solutions depended on running a full desktop session on the Pi, which I wanted to avoid in order to save its thin resources.
Goals
Since I intended to use this daily, and I could not see myself using anything I had tried, I decided to go for my own solution. I had a clear goal in mind : after setting it up, it should feel as much as using a regular external monitor as possible ; while still being able to run on outdated hardware.
My main requirements were the following :
- The latency should not be noticeable when scrolling or moving the mouse
- The picture quality should be high enough to read small text
- Since I planned to mainly use it for static text content, I decided to go easy on myself by setting a low target of 10 FPS.
- If the receiving end of the stream ever gets behind, it should catch-up to live as quick as possible
- Use Direct Rendering Manager to display the stream on the Pi instead of depending on a X server.
- I looked into remote-play tools and VNC because they seemed like easy to use low-latency solutions. However, I was not interested with streaming inputs back from the Pi to the laptop.
As I was using a Raspberry Pi 3, I had to consider its limitations :
- Due to slow CPU, use a low-overhead protocol and fast to decode encoding
- Due to slow network, use a low-bitrate encoding
- No hardware accelerated h264 decoding (this is not a limitation of the Pi 3 per se, but after experimentation using the
v4l2m2mcodecs negated all my optimizations regarding latency)
Since I was already going to roll my own solution, I also listed some non essential features I would enjoy having, including :
- Having a DHCP server on the Raspberry Pi so that I would not have to bother myself with IP settings
- Automatically running the necessary software on the Pi at boot so I never have to hook a keyboard or SSH into it for regular use
- Having the laptop automatically start streaming to the Pi when I enable a given virtual monitor with
xrandr(or one of its GUI wrapper such asarandr) - Automatically turning the pi-controlled monitor on and off as if it were a regular monitor hooked to a regular HDMI port
Making it happen
I knew the hardest part was going to fine-tune the video pipeline between the laptop and the Pi. I wanted to tackle this first and only spend time on other features when I was sure it was worth it.
I chose to encode and send the stream using ffmpeg on my laptop (which is known to be the Swiss-army knife of audio and video manipulation). It takes care of screen-grabbing, video encoding, encapsulation and networking and provides fine-grained controls over all steps. Its numerous options can often feel overwhelming, but digging the docs have never let me down.
For the receiving end, I considered several ffmpeg-compatible video players with Direct Rendering Manager support, including mpv, vlc, and ffplay (more on that topic later).
Raspberry Pi initial setup
I started with a fresh Raspberry Pi OS install, which I flashed on my SD card using the usual commands :
pierre@laptop:~ $ lsblk -f # Identify SD card block device
pierre@laptop:~ $ sudo dd if=2022-09-22-raspios-bullseye-arm64-lite.img of=/dev/sd[SD card letter]
I booted the Pi a first time with the screen and a keyboard attached. This lets Raspberry Pi OS resize the partition to fit the SD card. After connecting the Pi to my home WiFi and enabling SSH using raspi-config, I unplugged the keyboard from the Pi and SSH’ed into it.
I installed the required software to quickly start experimenting with the stream settings :
pi@raspberrypi:~ $ sudo apt-get update && sudo apt-get install mpv ffmpegpierre@laptop:~ $ sudo apt-get update && sudo apt-get install ffmpegWhile waiting for the players to install, I found an Ethernet cable to use between the Pi and the laptop. To my surprise, both computers seemed to be able to talk to each other without me doing anything, so I started tinkering with ffmpeg parameters. I don’t remember the details, but the connection ended up not being stable enough. It was necessary to install and configure a DHCP server on the Raspberry Pi in order to comfortably experiment.
pi@raspberrypi:~ $ sudo apt-get install udhcpd
pi@raspberrypi:~ $ sudoedit /etc/udhcpd.conf
This will install udhcpd and open its configuration file with root privileges using the editor set in your EDITOR shell variable (nano by default on Raspberry Pi OS). I used the following configuration file :
# Only one lease for the Pi itself, and one for the laptop
start 10.0.0.1
end 10.0.0.2

# udhcpd will use eth0
interface eth0

# Various options
option subnet 255.255.255.252
option domain hdmi
option lease  60  # One minute lease

# The Pi itself will always be 10.0.0.1
static_lease [PI MAC ADDRESS] 10.0.0.1
You will need to replace [PI MAC ADDRESS] with the actual MAC address of your hardware, which you can find by running ip a on the Pi (link/ether field).
pi@rapsberrypi:~ $ sudo systemctl enable udhcpd
pi@rapsberrypi:~ $ sudo systemctl restart udhcpd
The first command above will launch the DHCP server on boot, and the second one will launch it immediately. Rebooting the Pi may help both computers pick up on their new network configurations. From now on, the Raspberry Pi will be reachable from the laptop using 10.0.0.1 as long as the Ethernet cable is plugged to both. The laptop will use the IP 10.0.0.2.
Starting an unoptimized stream
With this initial setup done, I was able to quickly iterate over commands for sending and receiving the stream. This was not a straightforward process and while I did not keep records of every attempt, I’ll do my best to tell the interesting discoveries I made along the way. I will also detail every option in the commands presented below.
On the Raspberry Pi, the goal was to launch a media player that would listen on the network waiting for the laptop to send it a stream, and display it using DRM with the lowest possible latency. I first tried using mpv because of its support for GPU decoding.
Since both ends of the stream were connected over a single wire with no realistic opportunity for interception and I wanted to save resources on the Pi, encryption was not necessary. My requirements for lowest possible latency led my to try streaming over plain UDP. Long story short, my experiments with UDP did not go so well : one skipped packet and the whole screen would turn to garbage (or worse, the player would crash). I then switched to TCP, which proved to offer low-enough latency while not suffering from the same issue.
Let’s start with the most basic command that does that, without bothering with optimization for now :
pi@raspberrypi:~ $ mpv --hwdec=drm "tcp://10.0.0.1:1234?listen"This command makes mpv listen on interface 10.0.0.1, TCP port 1234 and will display the received stream using DRM.
On the sending side, I started with a simple command to test the stream :
pierre@laptop:~ $ ffmpeg -video_size 1920x1080 -framerate 5 -f x11grab -i :0.0+0x0 -f mpegts tcp://10.0.0.1:1234From man ffmpeg, the syntax is :
ffmpeg [global_options] {[input_file_options] -i input_url} ... {[output_file_options] output_url}Let’s detail the arguments used here :
-video_size 1920x1080indicates the size of the region to grab.-framerate 5only grabs 5 frames per second. This is below our requirement but this allows somewhat smooth testing of the setup before optimization.-f x11grab: used as an input file option,-fspecifies the input device.x11grabis used for screen grabbing.-i :0.0+0x0:-iis usually used for specifying input file. When used with the X11 video input device, specifies where to grab from in the syntax :[hostname]:display_number.screen_number[+x_offset,y_offset]-f mpegts: used as an output file option,-fspecifies the output container (also called file format or muxer).mpegtsdesignates MPEG-2 transport stream.tcp://10.0.0.1:1234is the URL to send the stream to (thempvlistener running on the Pi)
This did not meet any of my performance and quality requirements, but provided me with a starting point I could optimize from.
Optimizing the receiving end of the stream
I then tried two optimization strategies on the receiving side, which involved a lot of googling and a bunch of not-so-well documented mpv options :
- Speeding up decoding using hardware acceleration
- Jumping to the latest available frame when decoding fell behind
I came up with the following mpv command (which I will not detail) before trying another player :
pi@raspberrypi:~ $ mpv -vo=gpu --gpu-context=drm --input-cursor=no --input-vo-keyboard=no --input-default-bindings=no --hwdec=drm --untimed --no-cache --profile=low-latency --opengl-glfinish=yes --opengl-swapinterval=0 --gpu-hwdec-interop=drmprime-drm --drm-draw-plane=overlay --drm-drmprime-video-plane=primary --framedrop=no --speed=1.01 --video-latency-hacks=yes --opengl-glfinish=yes --opengl-swapinterval=0 tcp://10.0.0.1:1234\?listenWhile this achieved the best latency I could reach using mpv and the basic ffmpeg command above, I felt this was too complicated. Some other resources I found online were using ffplay on the receiving end so I gave it a try. This proved to be a much simpler path, and I achieved comparable results using the following command :
pi@raspberrypi:~ $ ffplay -autoexit -flags low_delay -framedrop -strict experimental -vf setpts=0 -tcp_nodelay 1 "tcp://10.0.0.1:1234\?listen"Most of these optimizations came from this StackOverflow post about minimizing delay in a live stream. Let’s detail the meaning of the options I used :
-autoexitmakesffplayexit when the stream ends-flags low_delayseemed like an obvious choice, even if the documentation is not clear about what it does-framedrop“Drop video frames if video is out of sync”-strict experimentalenables “unfinished/work in progress/not well tested” stuff. This proved to be useful. Note : the documentation mentions this option not being suitable for decoding untrusted input. You should probably remove it if you plan on plugging untrusted computers on your Raspberry Pi’s LAN port.-vf setpts=0:-vfis used to specify video filters. Thesetptsfilter changes the Presentation TimeStamp of video frames.setpts=0is used to make all frames display as soon as possible-tcp_nodelay 1enables the TCP nodelay flag. I’m not sure this one really had any impact, but it made sense to include it and did not hurt performances.
The stream sent by the basic ffmpeg command gets displayed on the Pi monitor with a delay of approximately 1 second using ffplay. This is too high, and the quality is too low for small text, but we are very close to the final command I’m still running on the Pi.
Let’s make sure the OS prioritizes the ffplay process using the nice and ionice commands :
pi@raspberrypi:~ $ sudo nice -n -20 ionice -c 1 -n 0 ffplay -autoexit -flags low_delay -framedrop -strict experimental -vf setpts=0 -tcp_nodelay 1 "tcp://10.0.0.1:1234\?listen"Supervising ffplay
Since the player automatically detects, decodes and demuxes the input codec and muxer, I could experiment with the sending side without changing the command run on the Pi. However, I still had to switch between terminals in order to manually restart ffplay between each try. This pushed me to take care of a non-essential feature before going on.
I used supervisor to manage the media player process. The choice was motivated by its ease of use over creating systemd services.
pi@raspberrypi:~ $ sudo apt-get install supervisor
pi@raspberrypi:~ $ sudoedit /etc/supervisor/conf.d/pimonitor.conf
This will install supervisor and open a configuration file for editing. I used the following content :
[program:ffplay]
command=nice -n -20 ionice -c 1 -n 0 ffplay -autoexit -flags low_delay -framedrop -strict experimental -vf setpts=0 -tcp_nodelay 1 "tcp://10.0.0.1:1234\?listen"
autorestart=true
stdout_logfile=/dev/null
stderr_logfile=/dev/null
The autorestart option makes a new instance of ffplay listen and wait for a new stream when the previous one exits. I used /dev/null for logfiles to prevent ffplay’s verbose output from filling my small SD card with log files.
After starting the supervisor daemon with sudo systemctl enable supervisor and sudo systemctl restart supervisor, I could try ffmpeg option combinations much quicker.
Fine-tuning the encoder process
The first thing I did was increase the framerate to 30 FPS, and I was really surprised to find out this helped a lot with latency. The encoder would still occasionally fall behind, which caused latency spikes, but the with that simple change it suddenly started to feel like I was on the right track.
I then tried switching from the default mpeg2video to the more modern mpeg4 which did not lead to any improvement in itself, but provided more options. Switching the muxer from mpegts to nut led to more noticeable improvements regarding delay. While quality was still too low, it started to feel responsive enough to meet the latency requirement.
I then managed to increase the quality to my standards by using encoder options to target a higher bit-rate (-b:v 40M -maxrate 50M -bufsize 200M). However, the Raspberry Pi became overloaded and started to drop a couple of frames a few times per seconds. This led to an unpleasant experience, with the mouse movements and scrolling not feeling smooth. What surprised me the most was seeing frames being dropped even when displaying a still screen.
Hunting down the framedrops
At this point, I was back to square one, trying to find the balance between picture quality and smoothness. One key difference, however, was that this time I was working with tools I was somewhat familiar with, and provided lots of options. After trying a few things that did not work, I noticed a few things :
ffmpegwas sending a stream with a bitrate of several Mbit/s for a still screen.- Framedrops from
ffplayseemed to happen at a very stable rate. - The Raspberry Pi did not seem to be limited by its CPU.
This hinted to me that the problem came from the network, so I launched a network capture using tcpdump :
pierre@laptop:~ $ sudo tcpdump -i eth0 -c 2000 -w diag_remote_screen.pcapng "port 1234"
pierre@laptop:~ $ tcpdump -r diag_remote_screen.pcapng | awk '{ print $1 " " $8 " " $9 " " $NF }' | less
This captures 2000 packets of the stream between ffmpeg running on the laptop and ffplay running on the Pi. The second command is used to examine the captured packets, but you can also open the .pcapng file with Wireshark or other similar tools.
The command above shows :
- The time at which the packet was captured
- The TCP sequence number for packets from the laptop to the Pi and their acknowledgments
- The size of packets
Here is a sample of its output :
14:13:36.879965 seq 79239:81556, 2317
14:13:36.881709 ack 81556, 0
14:13:36.916838 seq 81556:83849, 2293
14:13:36.918185 ack 83849, 0
14:13:36.943326 seq 83849:85014, 1165
14:13:36.944438 ack 85014, 0
14:13:36.981337 seq 85014:87613, 2599
14:13:36.982724 ack 87613, 0
14:13:37.014469 seq 87613:88769, 1156
14:13:37.015752 ack 88769, 0
14:13:37.054639 seq 88769:90701, 1932
14:13:37.055851 ack 90701, 0
14:13:37.077741 seq 90701:91858, 1157
14:13:37.079045 ack 91858, 0
14:13:37.121258 seq 91858:107786, 15928
14:13:37.121301 seq 107786:123714, 15928
14:13:37.121324 seq 123714:124626, 912
14:13:37.121360 seq 124626:140554, 15928
14:13:37.121374 seq 140554:156482, 15928
14:13:37.121386 seq 156482:172410, 15928
14:13:37.121391 seq 172410:188338, 15928
14:13:37.121403 seq 188338:204266, 15928
14:13:37.121410 seq 204266:220194, 15928
14:13:37.121421 seq 220194:236122, 15928
14:13:37.121426 seq 236122:252050, 15928
14:13:37.121438 seq 252050:267978, 15928
14:13:37.122535 seq 267978:283906, 15928
14:13:37.122567 ack 94754, 0
14:13:37.122567 ack 97650, 0
14:13:37.122567 ack 100546, 0
14:13:37.122585 seq 283906:299834, 15928
14:13:37.123237 ack 103442, 0
14:13:37.123237 ack 106338, 0
14:13:37.123238 ack 109234, 0
14:13:37.123255 seq 299834:315762, 15928
14:13:37.123891 seq 315762:331690, 15928
14:13:37.123916 seq 331690:347618, 15928
14:13:37.123926 ack 112130, 0
    [LOTS OF SUCCESSIVE ACKs]
14:13:37.135636 ack 254946, 0
14:13:37.136070 seq 347618:363546, 15928
14:13:37.136273 ack 257842, 0
14:13:37.136273 ack 260738, 0
14:13:37.136273 ack 263634, 0
14:13:37.136989 ack 266530, 0
14:13:37.136989 ack 269426, 0
14:13:37.136989 ack 272322, 0
    [REPEAT 25x THE ABOVE PATTERN OF A 15928 BYTES TCP PACKET FOLLOWED BY A FEW ACKs]
14:13:37.168585 seq 745818:761746, 15928
14:13:37.169275 ack 645906, 0
14:13:37.169275 ack 648802, 0
14:13:37.169275 ack 651698, 0
14:13:37.169857 seq 761746:769413, 7667
14:13:37.170274 ack 654594, 0
    [LOTS OF SUCCESSIVE ACKs]
14:13:37.179345 ack 769413, 0
14:13:37.184011 seq 769413:770863, 1450
14:13:37.185333 ack 770863, 0
14:13:37.214388 seq 770863:772194, 1331
14:13:37.215822 ack 772194, 0
14:13:37.241472 seq 772194:774010, 1816
14:13:37.243176 ack 774010, 0
At first, we see the laptop sends a packet that weights a couple kB approximately every 0.033s, which matches our framerate of 30fps. The Pi sends the acknowledgments for each of these packets before the next one comes in. At 14:13:37.121258, ffmpeg starts sending a lot of 16kB packets to the Pi and the acknowledgment numbers start falling behind. When the Pi gets too far behind, ffmpeg waits for ACKs to catch-up a little before sending more data (TCP sequence numbers 283906-769413). This burst of data from the laptop stops at 14:13:37.169857 (TCP seq num 769413) and the Pi TCP stack finally catches up at 14:13:37.179345 (TCP ack 769413). This is 0.58s (almost 2 frames) after the laptop began sending this data. This whole thing happened precisely every 12 frames and explained the details I noticed earlier about the framedrops.
The MPEG codec compresses videos by only saving a few frames in full, which are called keyframes. All other frames are derived from the previous frame which is associated with a description of the differences between consecutive frames. Data bursts occur every-time ffmpeg sends a keyframe, which is set by default to happen every 12 frame (~ 3 times/sec).
Increasing the “group of picture” codec option from 12 to 100 (~ once every 3 seconds) had the expected effect : framedrops were only happening once every 3 seconds, which I could live with.
At this point I had the following command :
pierre@laptop:~ $ ffmpeg -video_size 1920x1080 -framerate 30 \
    -f x11grab -i :0.0+0x0 \
    -b:v 40M -maxrate 50M -bufsize 200M \
    -vcodec mpeg4 -g 100 -f nut \
    "tcp://10.0.0.1:1234"
Even though I was satisfied with what I managed to get, I kept tinkering with options. At one point, it became difficult to tell what actually improved the experience and what could be attributed to some kind of placebo effect. Anyway, here is the final command I came up with :
pierre@laptop:~ $ ffmpeg -video_size 1920x1080 -r 30 -framerate 30 -f x11grab -i :0.0+0x0 \
    -b:v 40M -maxrate 50M -bufsize 200M \
    -field_order tt -fflags nobuffer -threads 1 \
    -vcodec mpeg4 -g 100 -r 30 -bf 0 -mbd bits -flags +aic+mv4+low_delay \
    -thread_type slice -slices 1 -level 32 -strict experimental -f_strict experimental \
    -syncpoints none -f nut "tcp://10.0.0.1:1234"
Extending the laptop display
For this task, my goal was to configure the X server on my laptop so that it could output to a virtual monitor I could then screen-grab and stream to the Raspberry Pi.
To accomplish this, I closely followed what virtual-display-linux does and I copied the provided configuration file for intel GPU. After rebooting, I could indeed see two monitors called VIRTUAL1 and VIRTUAL2 in my xrandr output.
Using the accepted answer from this StackOverflow thread I created the mode for my external monitor resolution and associated it with the first virtual display :
pierre@laptop:~ $ gtf 1920 1200 30 # gtf {W} {H} {FPS}
# Use the Modeline from the output of the above command in the command below
pierre@laptop:~ $ xrandr --newmode "1920x1200_30.00"  89.67  1920 1992 2184 2448  1200 1201 1204 1221  -HSync +Vsync
pierre@laptop:~ $ xrandr --addmode VIRTUAL1 "1920x1200_30.00"
Note that I used a resolution of 1920x1200 because this is the resolution of the monitor I’m using. If you are following along, you will need to change this to fit your actual screen resolution.
After enabling the virtual monitor using arandr (a graphical frontend for xrandr), I modified the -video_size and -i options in my ffmpeg command to grab the virtual display. This worked as intended and it effectively extended my laptop’s display to the Pi-driven monitor.
Wrapping xrandr
At this point, my solution was meeting all my primary requirements. I was able to set everything up so it really felt like using a regular monitor. However, I still had to run a bunch of commands by hand on the laptop. How nice would it be to enable the virtual display just like a regular one, and have the ffmpeg command run automatically with the right options ?
The solution I came up with feels a bit hacky : I wrote a wrapper script for xrandr.
#!/bin/bash

# Enable job control
set -m

# Extract arguments between `--output VIRTUAL1` and the next occurrence of `--output`
V_ARGS=$(echo "$@" | grep "VIRTUAL1" | sed -e 's/.*--output VIRTUAL1 //' -e 's/ \?--output.*//')

# Run the real xrandr
# (using full path YOU MAY NEED TO UPDATE THIS DEPENDING ON YOUR DISTRO)
/usr/bin/xrandr "$@"

# If there were no args related to VIRTUAL1, exit with the same exit code as `xrandr`
EXITCODE=$?
if [ $(echo $V_ARGS | wc -w) -eq 0 ]; then
    exit $EXITCODE
fi

# Kill the previous ffmpeg process if it exists
kill $(cat /tmp/remote_screen_ffmpeg.pid)
KILLEDFFMPEG=$?
rm /tmp/remote_screen_ffmpeg.pid

# If the arguments for the display contain `--off`
if [ $(echo $V_ARGS | grep -e "--off" | wc -l) -ge 1 ]; then
    echo "Screen off" >> ~/testxrandr # For debugging
else
    # Extract the arguments for the display we're interested in
    MODE=$(echo $V_ARGS | sed -e 's/.*--mode \([^ ]*\).*/\1/')
    POS=$(echo $V_ARGS | sed -e 's/.*--pos \([^ ]*\).*/\1/')
    ROTATE=$(echo $V_ARGS | sed -e 's/.*--rotate \([^ ]*\).*/\1/')

    # If the display is rotated, invert width and height in $MODE
    if [[ $ROTATE == "left" ]] || [[ $ROTATE == "right" ]]; then
        MODE=$(echo $MODE | sed -e 's/\([0-9]*\)x\([0-9]*\)/\2x\1/')
    fi

    # $VFARG will be used later in an ffmpeg option
    case $ROTATE in
        normal)
            VFARG="null"
            ;;
        left)
            VFARG="transpose=2"
            ;;
        right)
            VFARG="transpose=1"
            ;;
        inverted)
            VFARG="transpose=2,transpose=2"
            ;;
        *)
            VFARG="null"
            ;;
    esac

    # If there was a previously running ffmpeg process which we killed,
    # wait 5 seconds for the supervisor daemon on the Pi to restart ffplay
    if [ $KILLEDFFMPEG ]; then
        sleep 5
    fi

    # ffmpeg command, the magic happens here
    taskset -c 0 ffmpeg -nostdin \
        -video_size $MODE -r 30 -framerate 30 -f x11grab -i :0.0+$POS \
        -b:v 40M -maxrate 50M -minrate 1K -bufsize 200M \
        -field_order tt -fflags nobuffer -threads 1 \
        -vcodec mpeg4 -g 100 -r 30 -bf 0 \
        -mbd bits -me_method full -flags +aic+mv4+low_delay -me_method full \
        -thread_type slice -slices 1 -level 32 \
        -strict experimental -f_strict experimental -syncpoints none \
        -vf "$VFARG" -f nut -tcp_nodelay 1 \
        "tcp://10.0.0.1:1234?tcp_nodelay=1" >/dev/null 2>&1 &

    # Save the ffmpeg pid to a file which we'll read on next invocation
    FFMPEGPID=$!
    disown $FFMPEGPID
    echo $FFMPEGPID > /tmp/remote_screen_ffmpeg.pid
fi

# Return the same exit code as xrandr did
exit $EXITCODE
You can recognize the ffmpeg command from earlier. There are however a few different things :
- The
-video_sizeand-ioptions are determined from thexrandrinvocation - Depending on the screen orientation, we use a video filter to rotate the stream
ffmpegis invoked throughtaskset
I saved this script as ~/.local/bin/xrandr. For this to work, you need to have your ~/.local/bin directory in your path, with a higher priority than system-wide directories. This is achieved by adding the following line in your ~/.bashrc (or whatever rc file your shell uses) :
export PATH="$HOME/.local/bin:$PATH"This wrapper script is run every time I run a xrandr command, including from GUI frontends such as arandr. It manages the ffmpeg process and starts the stream whenever the VIRTUAL1 display is enabled. It even manages screen orientation, which was essential to me since I actually use this monitor in portrait orientation.
Managing power
After writing the wrapper script, I was really happy with the result. I even got the pleasant surprise of not having to handle resuming the stream after the laptop wakes up from sleep. Since ffmpeg was not exiting on sleep, ffplay silently waited for the laptop to start sending data again. There was one thing bothering me though : I still had to manually power the monitor on and off when leaving my desk.
I googled for how to turn the HDMI port of the Raspberry Pi on and off, and quickly found out about the vcgencmd command and its display_power subcommand. Unfortunately, every command I tried seemed to have no effect on the Raspberry Pi 3. It took me a few days to find a fix : by editing the /boot/config.txt to replace dtoverlay=vc4-kms-v3d with dtoverlay=vc4-fkms-v3d and rebooting the Pi, it worked. It seems like the kms driver has a bug on the Raspberry Pi 3. Fortunately, switching VideoCore drivers did not impact the stream decoding performance. With that issue fixed, I was able to turn the screen on and off from an SSH session.
In order to run the vcgencmd commands at the right time, I once again went the hacky way and came up with a short script (featuring a dirty infinite loop) :
#!/bin/bash

while true; do
	if [ $(sudo timeout 2 tcpdump -i eth0 "port 1234" | wc -l) -gt 1 ]; then
		vcgencmd display_power 1 2
	else
		vcgencmd display_power 0 2
	fi
done
The loop does the following :
- Run
tcpdumpfor two seconds and count the number of packets received on port 1234 during this time - If there was at least one packet received during the last 2 seconds, turn the display on
- If no packets were received during the last 2 seconds, turn the display off
- Repeat
I saved the script on the Pi as /home/pi/check_screen_input.sh and edited the supervisor configuration file :
[program:power_mgmt]
command=/home/pi/check_screen_input.sh
autorestart=true
I then restarted the supervisor daemon, which had the effect of stopping the stream. The monitor went back to the Pi tty and after a short moment, turned off. I then disabled and re-enabled the VIRTUAL1 display on my laptop, and the magic happened : the monitor woke up from sleep and extended the laptop’s display.
Improvements and last thoughts
I finally reached a solution I could use in my day-to-day life, with only small quirks I don’t mind dealing with. Here’s a video showcasing the setup I’m using daily :
I still have to manually create the new mode and add it to the virtual display after every reboot. It would be really nice to have the Pi detect the resolution of the monitor and use it to automatically configure the virtual display on the laptop. However, since I’m of the kind who rarely reboots their computers and I already spent quite some time on this project, I moved on from it without taking care of this part.
The main defect is that I sometimes get visible encoding/decoding glitches that fix themselves on the next keyframe. I don’t know what causes them. If you have leads on this, please open an issue in the GitHub repository.
I made a GitHub repository that features all needed configuration files and scripts, as well as untested installation scripts. The part that runs on the Raspberry Pi seems like a good opportunity to learn how to make a .deb package, so I may look into it in the future. If there is interest around this project, I may get motivated to make the process more streamlined and beginner-friendly.
Overall, I am really satisfied with what I managed to come up with. While using it, I even noticed I was able to watch videos without the audio-video delay being noticeable. With this solution available, and considering the money it saved me, I may knowingly purchase a laptop that lacks a second video output when I need to replace this one.
Updates
DisplayLink
Some readers have mentioned that this project is very similar to DisplayLink. I don’t remember coming across this when I did the research for this project. I think this is because the naming makes it ambiguous that this is not the same thing as DP over USB, and I may have dismissed results mentioning it at the time.
After looking more into it, it is indeed really similar to what I did : it requires installing software on the host computer, and uses an active adapter. One key difference though is that the software you must install to use DisplayLink is proprietary, while this project only uses open source parts.
GUD
Some other readers have mentioned GUD, which does the same thing I did except it uses USB and looks a lot cleaner on the host side by using a kernel module. I did not really look into the Raspberry Pi side of this project, but I’m making a note to come back to it later.
Socket activated services
If I ever get to turning the Pi-side of the project into a deb package, I will probably make good use of this suggestion to use systemd socket activated services as a replacement for using supervisord.